How to Wax a Canvas Bag | A Step-by-Step Guide
Waxed canvas bags have become increasingly popular due to their durability, water resistance, and vintage aesthetics. If you own a canvas bag and want to refresh its waterproofing capabilities or enhance its overall appearance, waxing it is a great DIY project to undertake. In this comprehensive guide, we will walk you through the step-by-step process of How to Wax a Canvas Bag, providing you with all the information you need to successfully complete this task.
Why Wax Your Canvas Bag? | How to Wax a Canvas Bag
Waxing your canvas bag offers several benefits. Not only does it refresh the original colors of the fabric, but it also restores the bag’s waterproof nature, ensuring that your belongings remain safe and dry even in inclement weather. Additionally, waxing your canvas bag demonstrates your pride in your belongings and promotes sustainability, as these bags are designed to be long-lasting and not disposable.
Tools You’ll Need
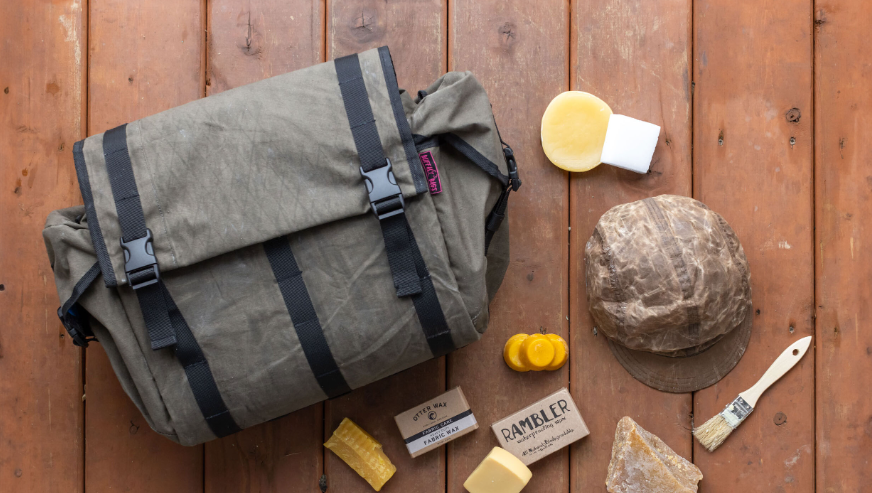
Before you begin the waxing process, make sure you have the following tools on hand:
- Blow dryer (with heat setting)
- Soft bristle brush
- Bowl with water
- Mild soap (such as Dawn)
- Clean lint-free cloth or an old t-shirt
- Wax specifically designed for waxed canvas bags
- Music to enjoy during the process
- Elbow grease for a job well done
Step 1: Clean Your Bag
Before applying wax to your canvas bag, it’s essential to clean it thoroughly. Over time, a well-used canvas bag may accumulate dirt, stains, and lose some of its original luster. To clean your bag:
De-lint your bag by using tape or a lint brush, paying extra attention to the seams around the top and sides.
Fill a container with water and add a small amount of mild soap, such as Dawn.
Use a soft bristle brush to clean the panels of the bag with the soapy mixture. Don’t be afraid to apply some pressure as canvas bags can handle it.
Allow your freshly washed bag to air dry overnight. Avoid using a blow dryer, as the heat can shrink the bag’s fibers.
Related: How to Clean a Duffel Bag in the Washing Machine
Step 2: Melt the Wax
Now that your bag is clean and dry, it’s time to melt the wax. Follow these steps:
Take your tin of wax and use a blow dryer to apply heat. The goal is to melt the wax slightly, making it mushy but not transparent.
Ensure that the wax is consistently heated throughout the process by reheating it when necessary.
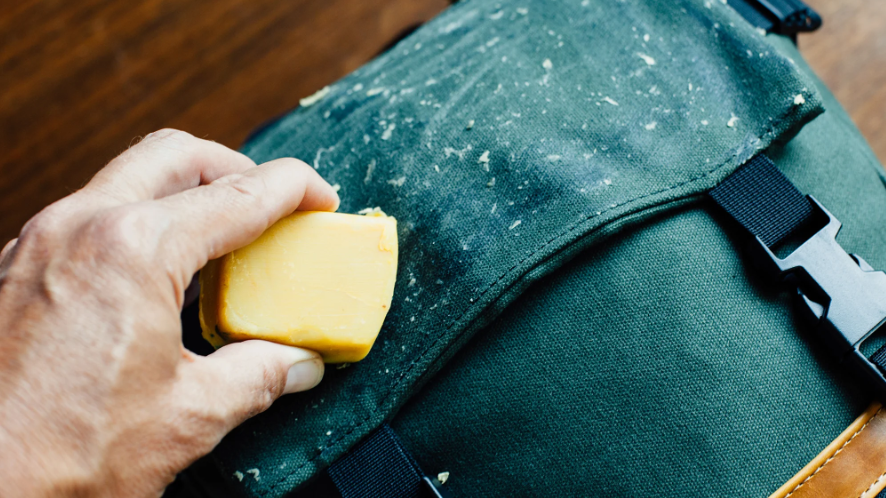
Step 3: Apply the Melted Wax
With the melted wax ready, it’s time to apply it to your canvas bag. Follow these instructions:
Wrap a clean lint-free cloth or an old t-shirt around your index finger, creating a makeshift applicator.
Dip your cloth-wrapped finger into the mushy wax and apply it directly to the bag, focusing on one section at a time.
Aim for a consistent and even coat, ensuring that all sections and edges of the canvas are covered. Avoid getting wax on any leather parts of the bag.
Take your time during this process, as applying wax to a medium-sized bag, such as a FLIGHT brief, may take around thirty minutes.
Step 4: Even Out the Wax Coat
Once you have applied a coat of wax to your bag, it’s important to even out the wax and remove any excess. Follow these steps:
Use a blow dryer to evenly distribute the wax and remove any blotchy areas. This process will also help the wax penetrate the seams and fabric, creating a more uniform appearance.
Spend approximately 15 minutes on this step to ensure the wax is thoroughly sealed into the bag. Patience is key.
Step 5: Let the Bag Sit Overnight
After completing the waxing process, allow your bag to sit overnight. The wax will make the bag slightly moist, so it’s important to let it dry completely before using it. The next day, your bag will be ready for another year of use.
Caring for Your Waxed Canvas Bag
To maintain the quality and longevity of your waxed canvas bag, proper care is essential. Here are some tips to help you keep your bag in excellent condition:
Avoid machine-washing your waxed canvas bag, as this can remove the wax coating. Instead, spot clean any stains with cold water and a sponge or soft brush.
Refrain from using soap, detergent, solvent, or starch-based stiffeners when cleaning your bag, as these can damage the wax coating.
Allow your bag to air dry after cleaning, avoiding exposure to direct sunlight or excessive heat.
Over time, you may notice some wear and tear on your bag. To maintain its appearance, consider reapplying wax every year or two, depending on use.
Frequently Asked Questions
How often should I wax my canvas bag?
Can I use any wax for waxing canvas bags?
How do I clean my waxed canvas bag?
Can I wax canvas fabric myself?
Conclusion
Waxing your canvas bag is a rewarding and practical DIY project that allows you to refresh its waterproofing capabilities while maintaining its vintage charm. By following the step-by-step instructions provided in this guide, you can easily wax your bag and enjoy its durability for years to come.
Remember to clean your bag thoroughly before applying wax, ensure even distribution, and let it dry completely before use. With proper care and occasional reapplication of wax, your waxed canvas bag will continue to serve you well in various weather conditions. So, grab your tools and get ready to embark on this satisfying journey of waxing your canvas bag!